How to Knock In an English Willow Cricket Bat: Step-by-Step Guide
September 30, 2026 · Muhammad Azhar Iqbal
A new English Willow cricket bat is a serious investment, and proper knocking can help you get the best performance from it. Before using your bat , it is really important to knock it.
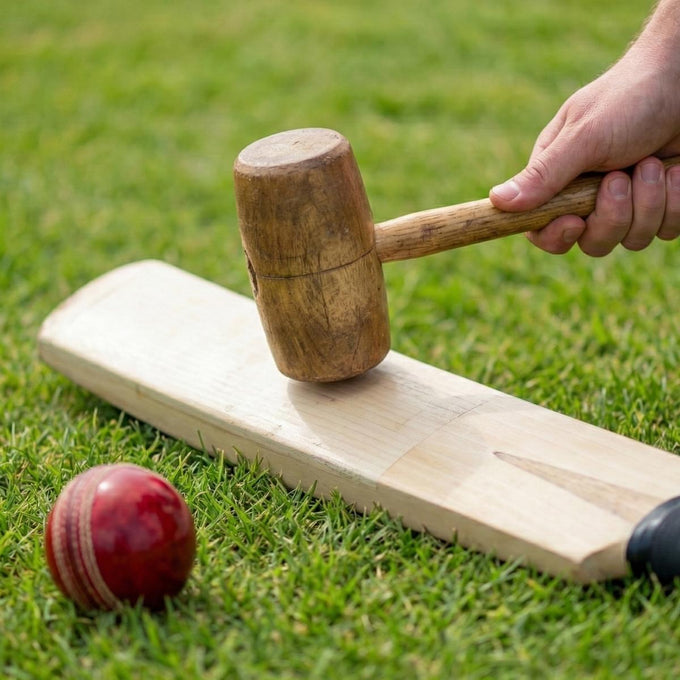
Knocking a bat involves compressesing the willow fibres using a knocking mallet. It helps bat absorb the shock & prevents the willow from breaking.
What Does "Knocking In" a Cricket Bat Mean?
Knocking in is the process of gradually preparing a new cricket bat for use with a cricket ball.
A bat mallet is used to gently compress the willow on the face, edges and around the sweet spot. This prepares the willow for professional matches. Even Premium English Willow high grade bats requires a proper knocking unless they might also break.
Essentials for knocking a Bat
A Wooden Knocking mallet
Linseed Oil
A new Cricket ball
Batting gloves to prevent contact with oil
A cloth for drying the oil
Step 1: Check Your Bat
Before knocking in, carefully inspect your bat:
Check the face for cracks, dents or other visible damage.
Inspect the edges carefully.
Check the toe and make sure it is in good condition.
Make sure the bat has no existing damage before starting.
If your bat has a protective facing or toe guard, do not remove it unless the manufacturer's instructions recommend doing so.
Step 2: Oil the Bat If Required
Some untreated English Willow bats require a light application of raw linseed oil before knocking in.
Apply a thin, even layer of oil to the bat.
Avoid soaking the willow with too much oil.
Allow the oil to absorb properly according to the manufacturer's instructions.
Step 3: Start Knocking the Face
Place the bat securely on a suitable surface and begin with gentle taps using the mallet.
Start around the middle of the face and gradually work across the main hitting area.
Don't try to complete the process by hitting the bat as hard as possible. The aim is gradual compression of the willow.
Step 4: Carefully Prepare the Edges
The edges require particular care.
Gradually work along the edges with controlled mallet strokes. Avoid aggressive, direct strikes that could damage the edge.
The objective is to gradually round and strengthen the edges, not flatten or damage them.
Step 5: Prepare the Toe
The toe also needs attention, but use controlled force.
Don't aggressively strike the very bottom of the bat. Carefully prepare the area according to the manufacturer's recommendations.
Step 6: Test the Bat With an Old Ball
Once the mallet work is complete, don't immediately take the bat into a match.
Start with gentle throw-downs using an older, softer cricket ball. Gradually increase the pace and intensity.
If the ball leaves deep seam marks or obvious dents, the bat needs more preparation.
Common Mistakes to Avoid
❌ Using too much force Start gently and gradually increase the pressure.
❌ Skipping the edges The edges need careful preparation too.
❌ Using a new hard cricket ball immediately Start with controlled testing and gradually increase the intensity.
❌ Over-oiling the bat Too much oil can negatively affect the bat. Follow the manufacturer's instructions.
❌ Ignoring the manufacturer's instructions Different bats can have different preparation requirements.
Batting gloves from various international brands are widely used globally and constitute essential equipment for cricket. Nevertheless, many individuals lack sufficient knowledge regarding the selection of the optimal...
A new English Willow cricket bat is a serious investment, and proper knocking can help you get the best performance from it. Before using your bat , it...
Why Gray Nicolls is trending in USA? Gray Nicolls is one of the most trusted cricket bat brands in the world. Their demand is significantly increasing in the...
Gray Nicolls has just finally launched its highly anticipated 2026 Range. selling premium quality new bats and updated gears for players of all levels. Whether you’re a professional...